Connect Salesforce Data Cloud to DBeaver
Use DBeaver to explore and query your Salesforce Data Cloud data through a modern SQL interface. This integration leverages the open-source Data Cloud JDBC Driver and supports Data Cloud Query API SQL Syntax.
This guide walks you through setting up the connection step by step.
Prerequisites
Download and install the latest version of DBeaver for your operating system from dbeaver.io/download.
Step 1: Enable Required Org Settings
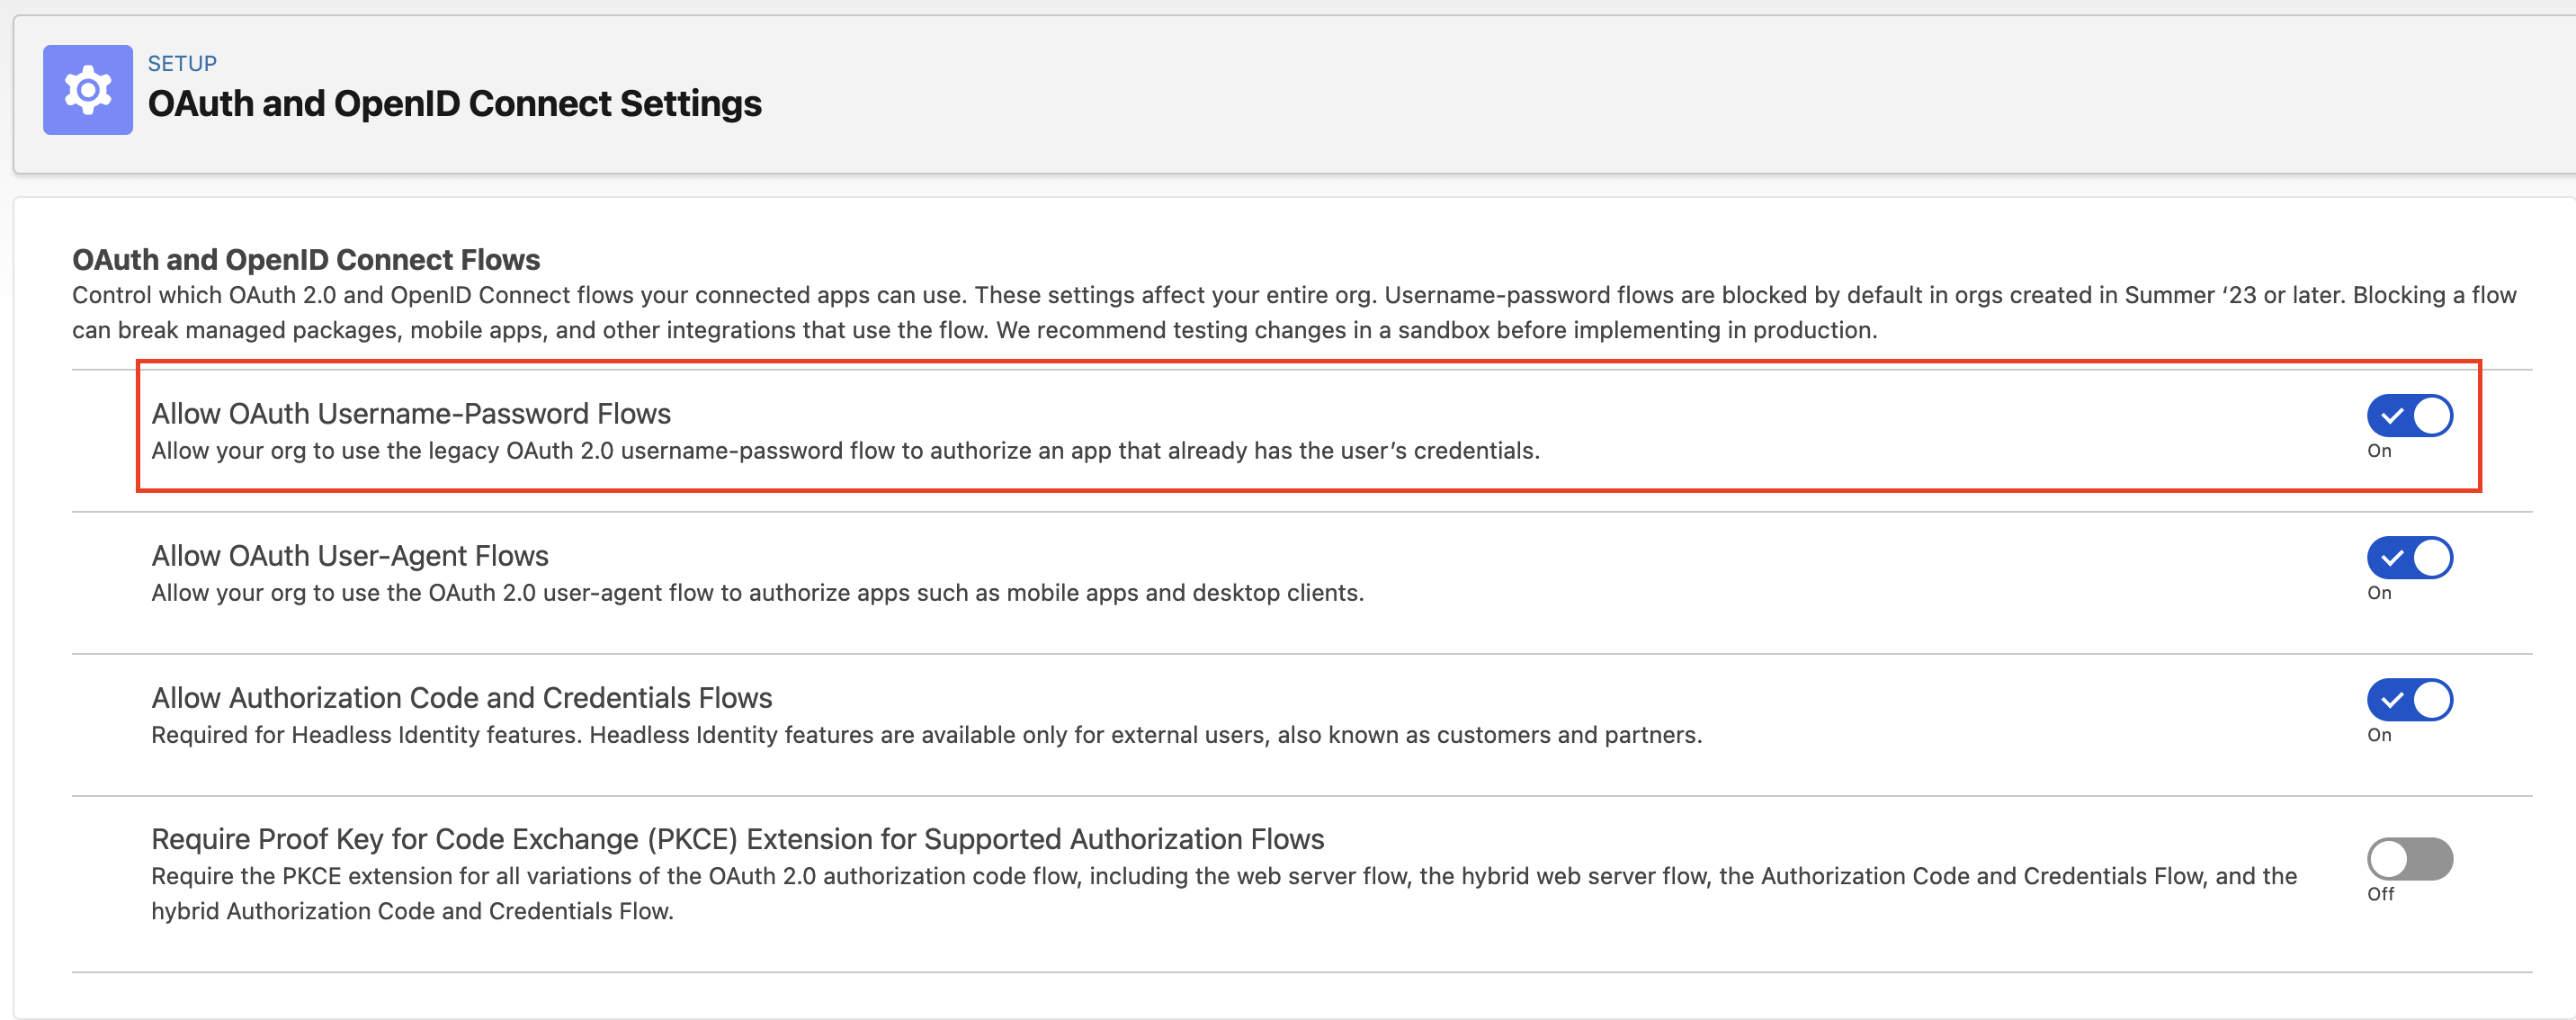
Allow OAuth Username-Password Flows
Go to Setup > Search for "OAuth and OpenID Connect Settings"
Enable OAuth 2.0 username-password flow authentication in your org by checking the "Allow OAuth Username-Password Flows" checkbox in the OAuth and OpenID Connect Settings.
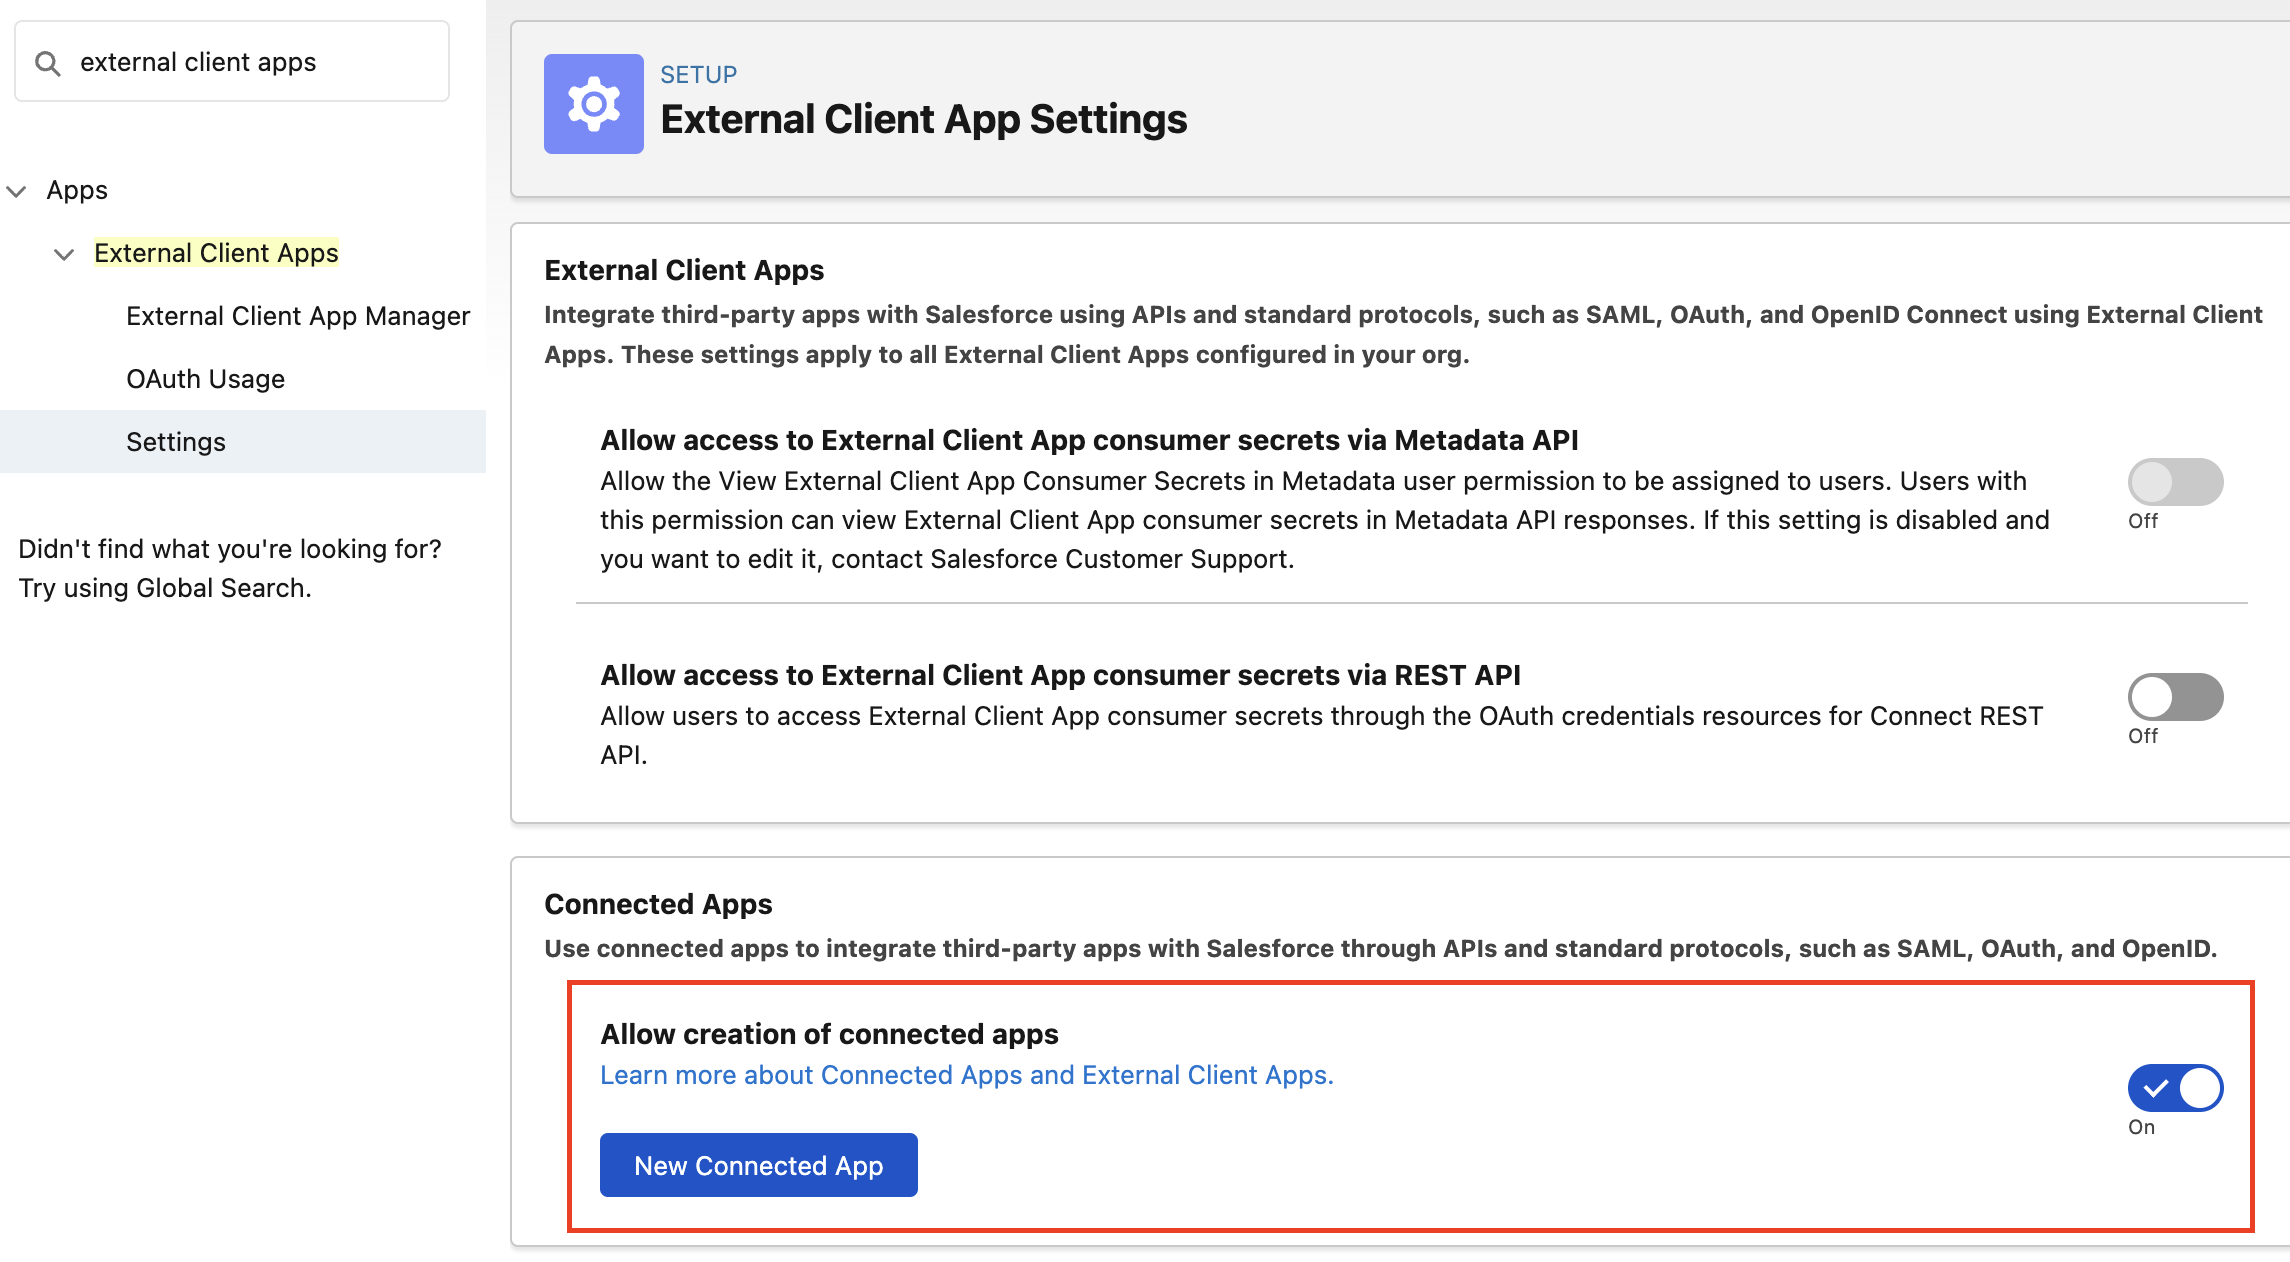
Allow Creation of Connected Apps
Go to Setup > Search for "External Client Apps" > Settings
Enable the Allow creation of connected apps checkbox.
Step 2: Create a Connected App
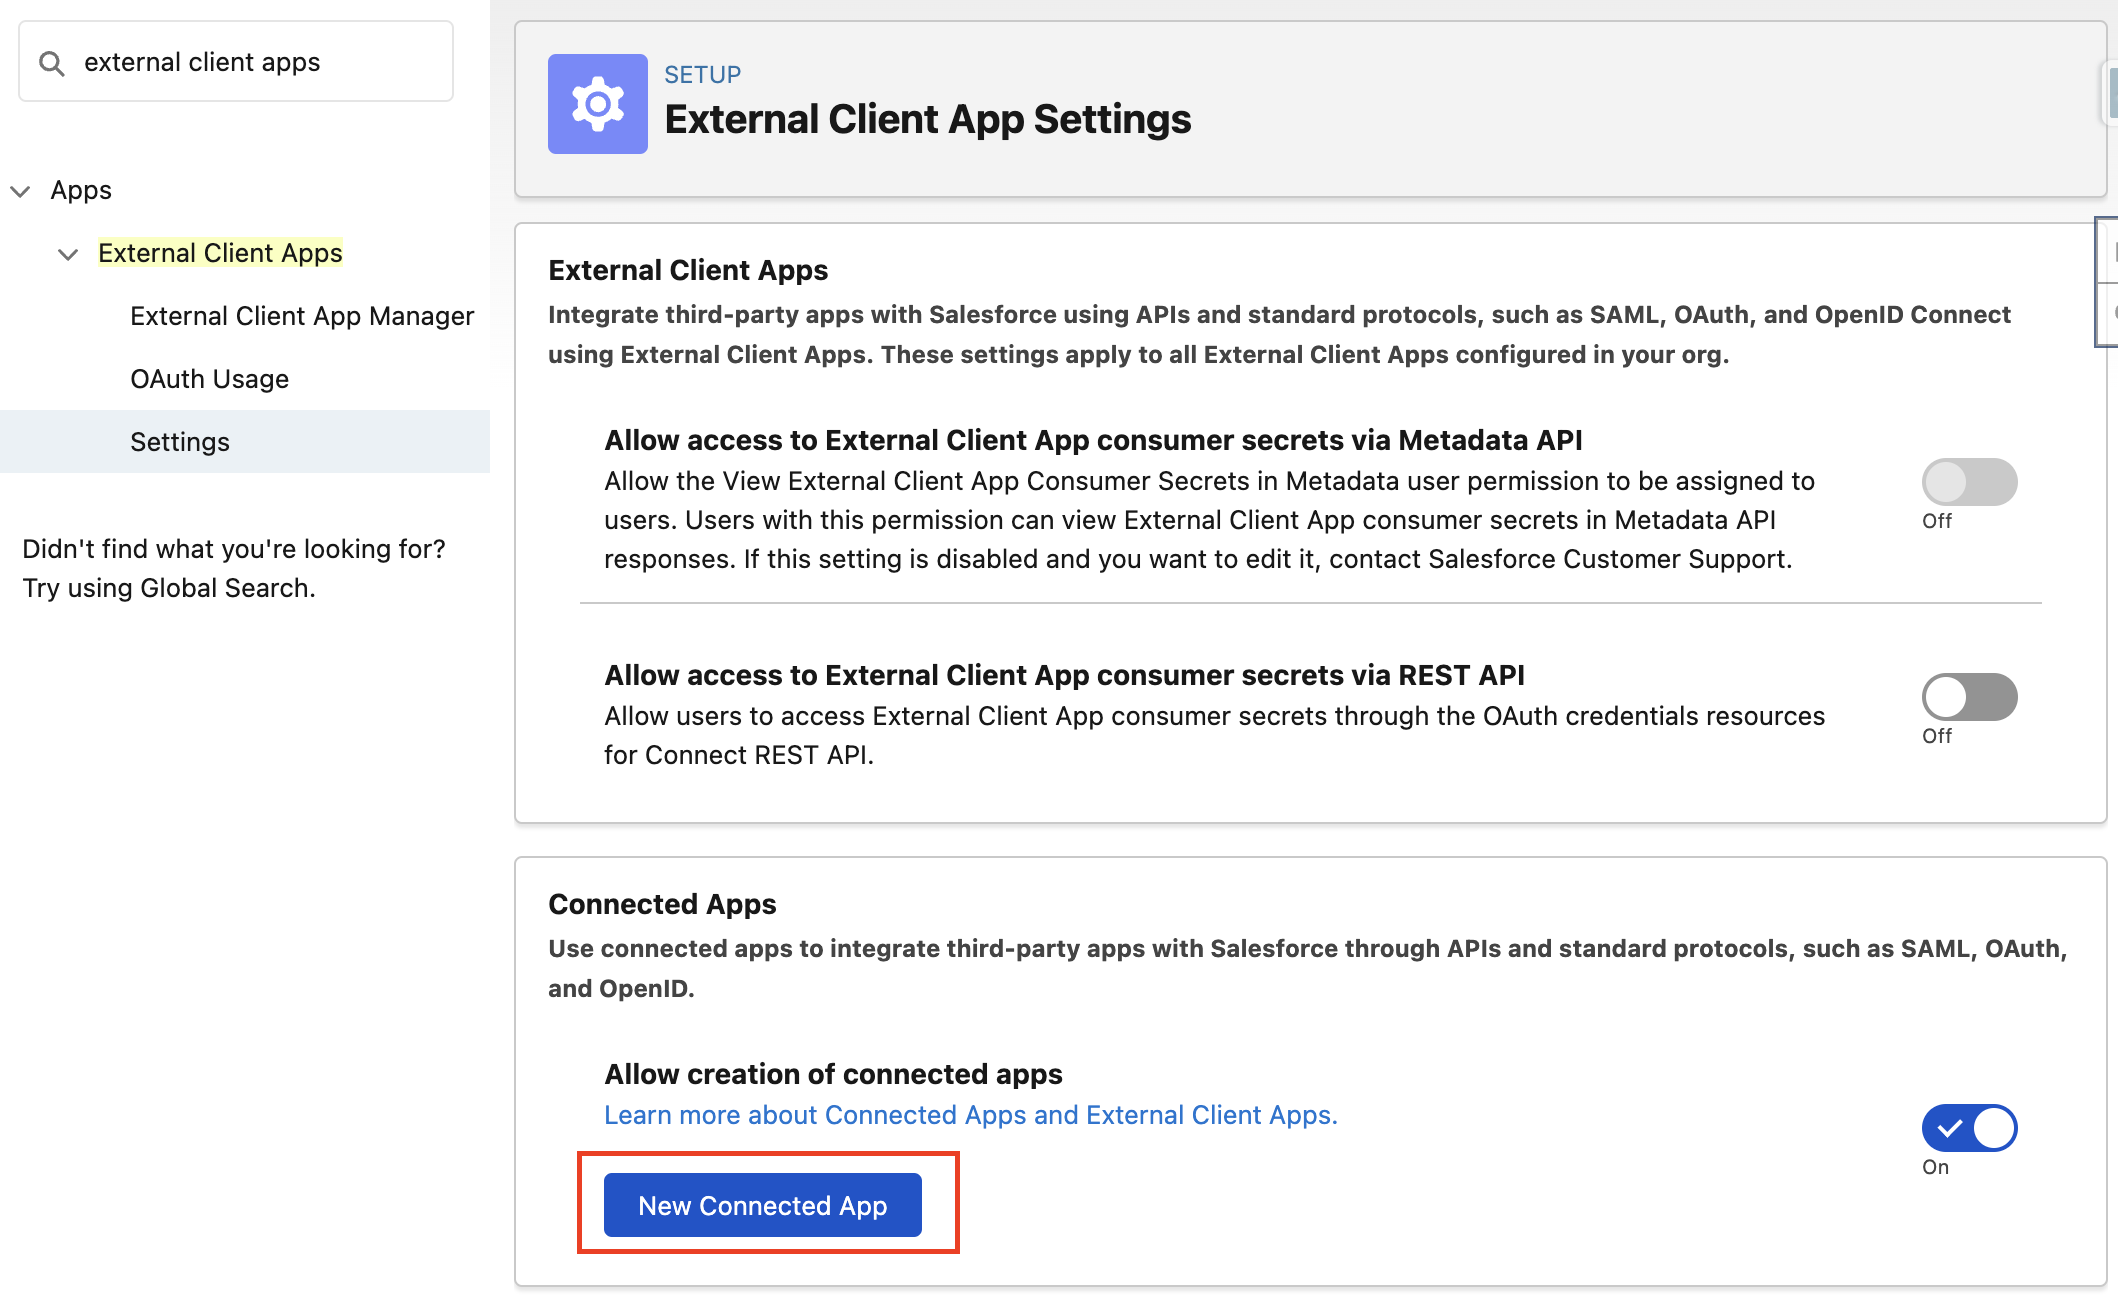
Go to Setup > Search for "External Client Apps" > Settings
- Click on
New Connected App
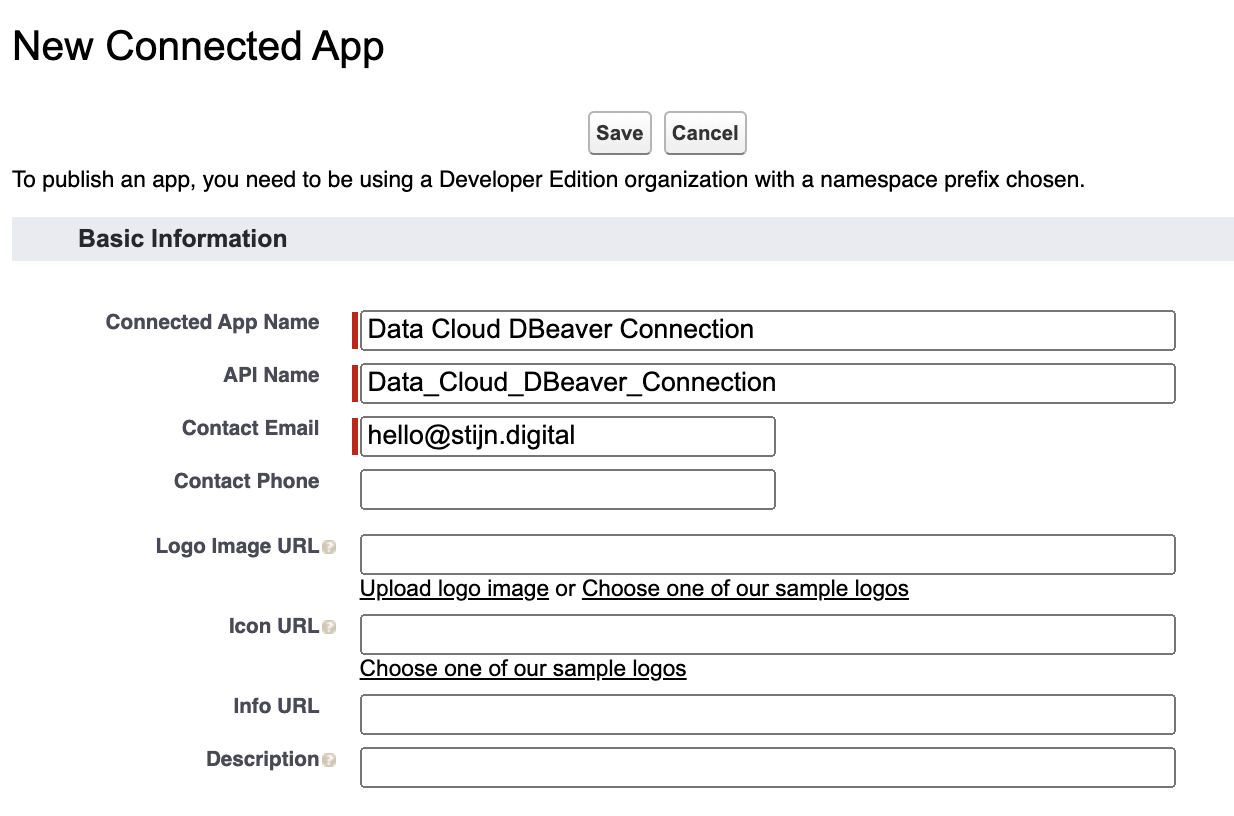
- Fill out the following details:
- Connected App Name:
Data Cloud DBeaver Connection - API Name:
Data_Cloud_DBeaver_Connection - Contact Email:
your-email@example.com
- Check the
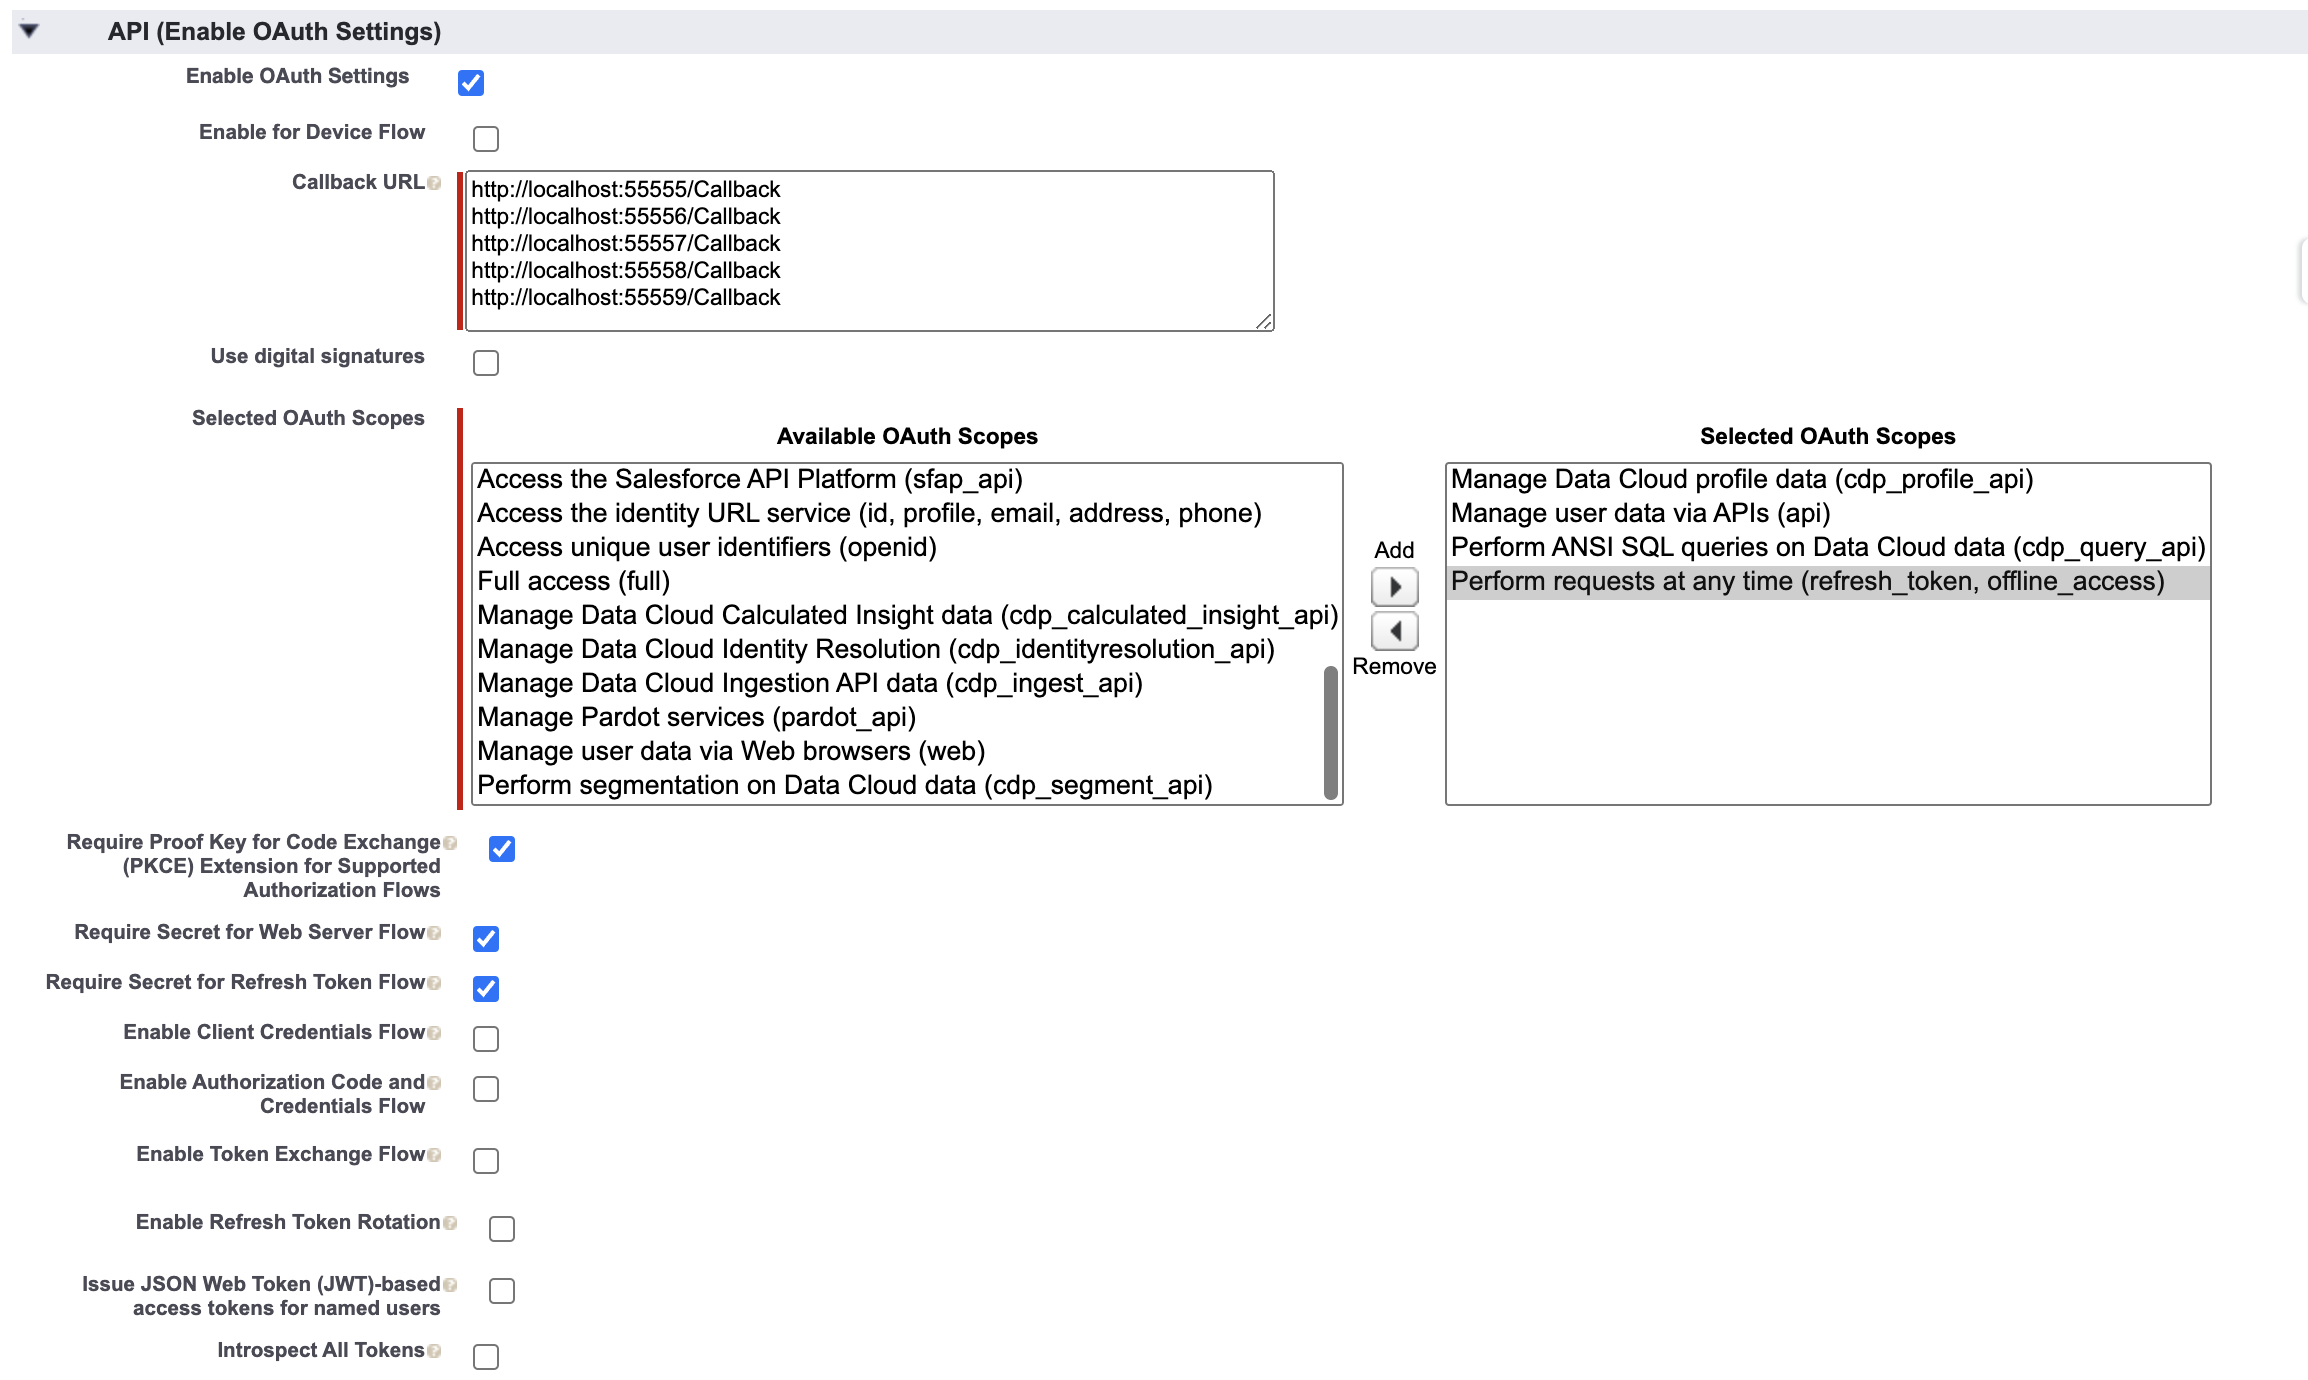
Enable OAuth Settingscheckbox - Enter the following Callback URLs:
http://localhost:55556/Callback
http://localhost:55557/Callback
http://localhost:55558/Callback
http://localhost:55559/Callback
- Select the following OAuth Scopes:
- Manage user data via APIs (api)
- Manage Data Cloud profile data (cdp_profile_api)
- Perform ANSI SQL queries on Data Cloud data (cdp_query_api)
- Perform requests at any time (refresh_token, offline_access)
-
Leave everything else as default and click on the
Savebutton. -
Click
Continue.

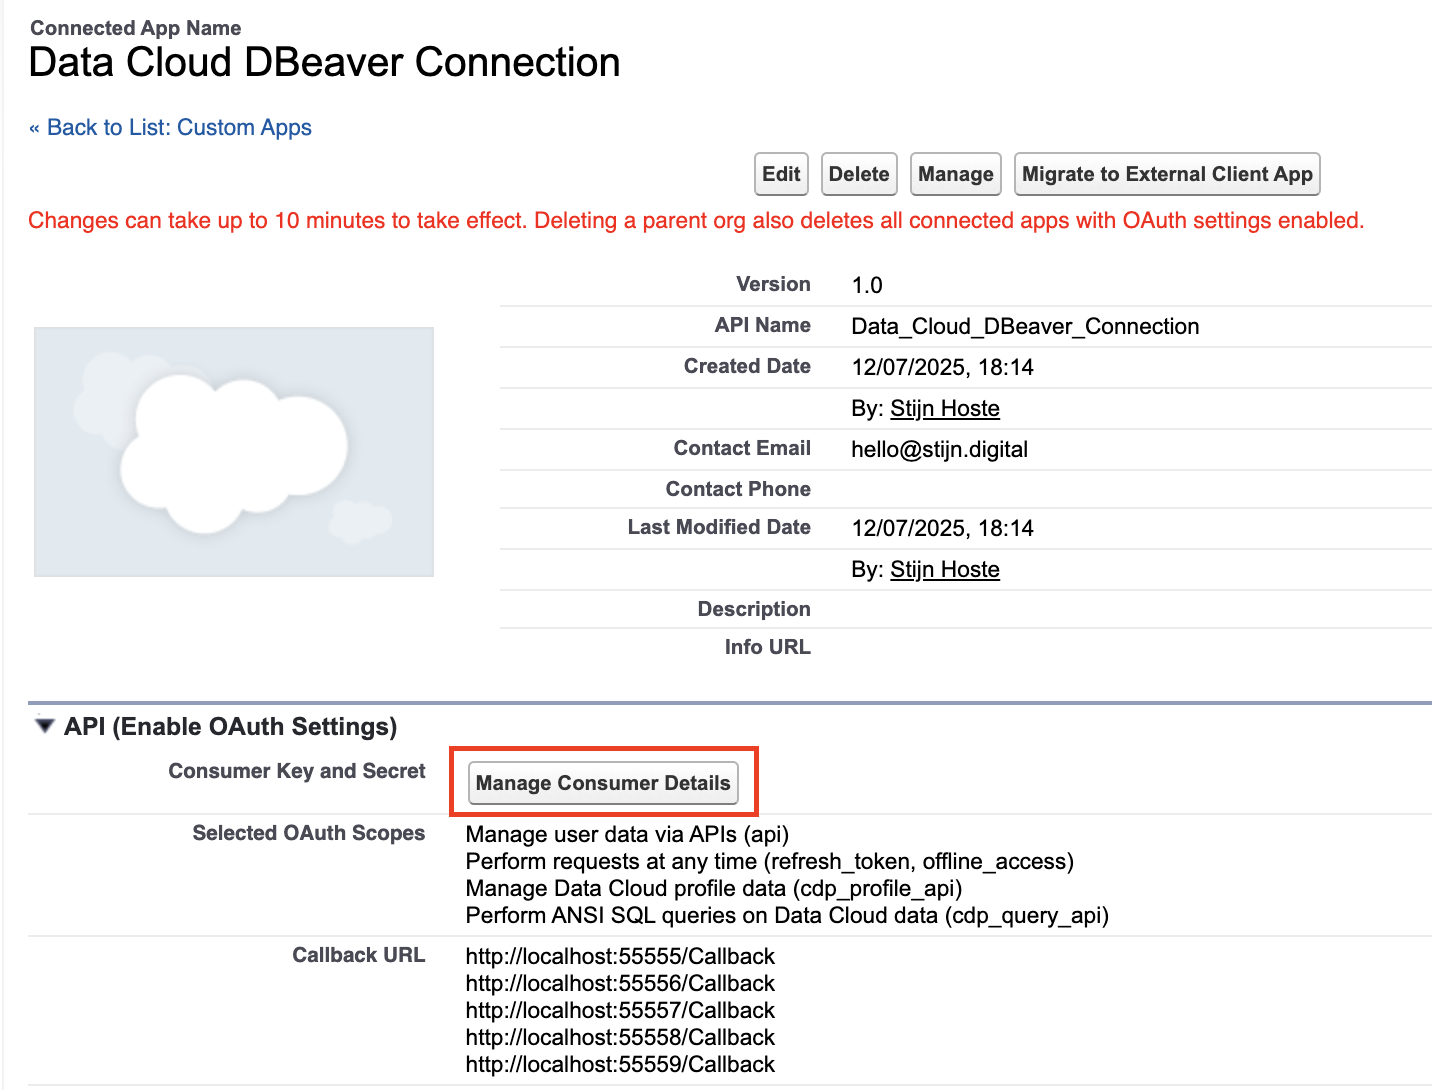
- Click
Manage Consumer Details.
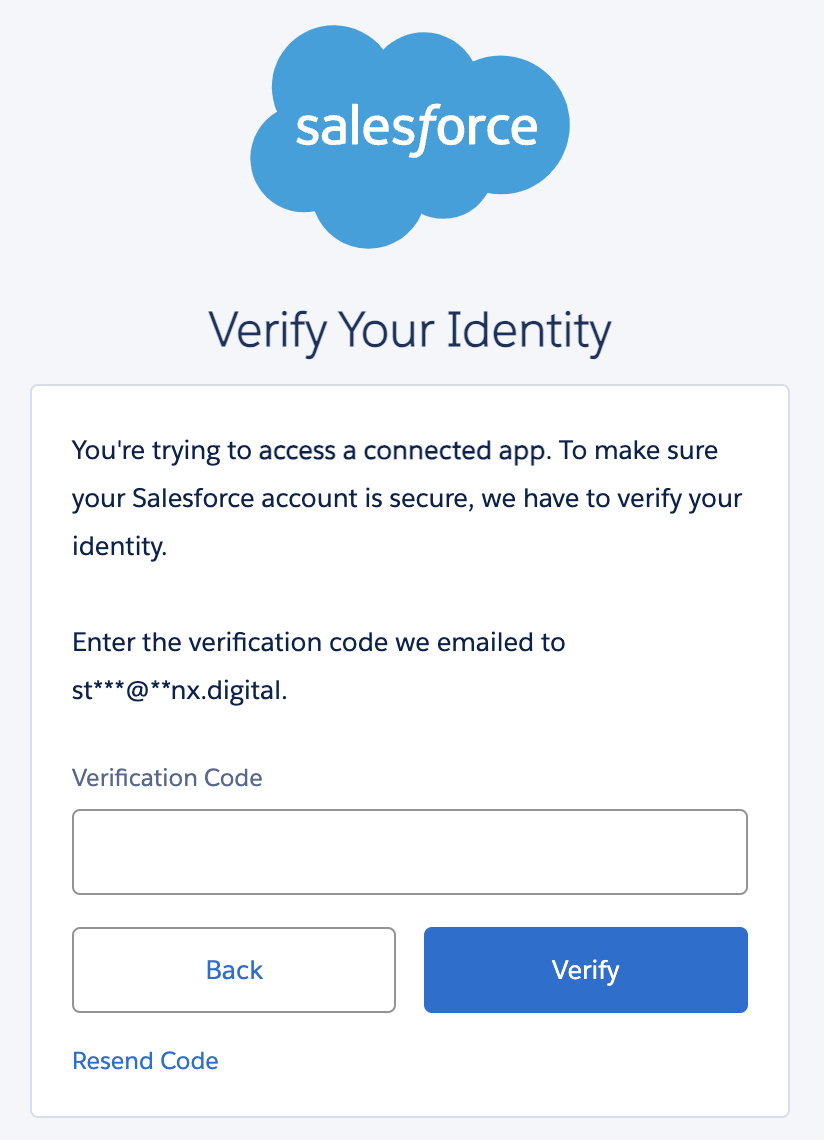
-
An verification code will be sent to the email address configured on the user that you're logged in as.
-
Get the code, and enter it in the
Verification Codefield and clickVerify.
- Take the
Consumer KeyandConsumer Secretand copy them somewhere, you will need them to connect to your Data Cloud instance in DBeaver.

Step 3: Relax IP Restrictions
- Go to Setup > Search for "App Manager"
- Find your Connected App
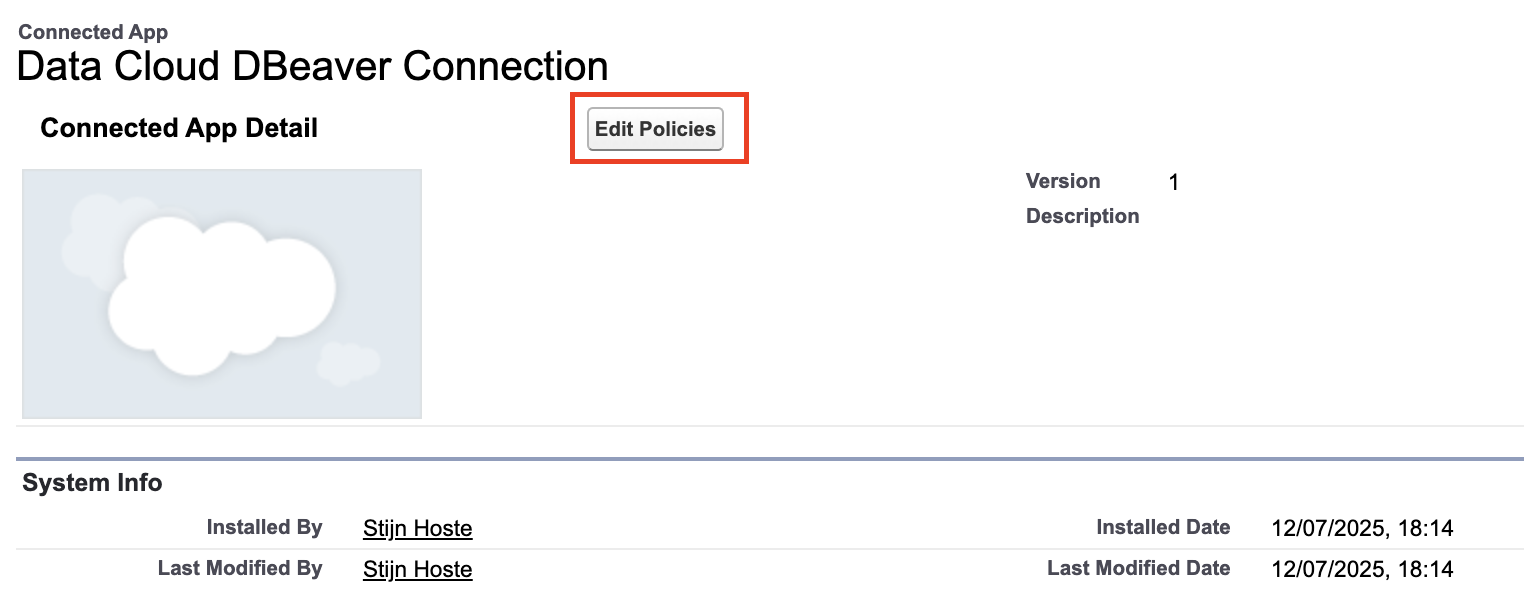
Data Cloud DBeaver Connection, click on the arrow to the right of the app name and click 'Manage'
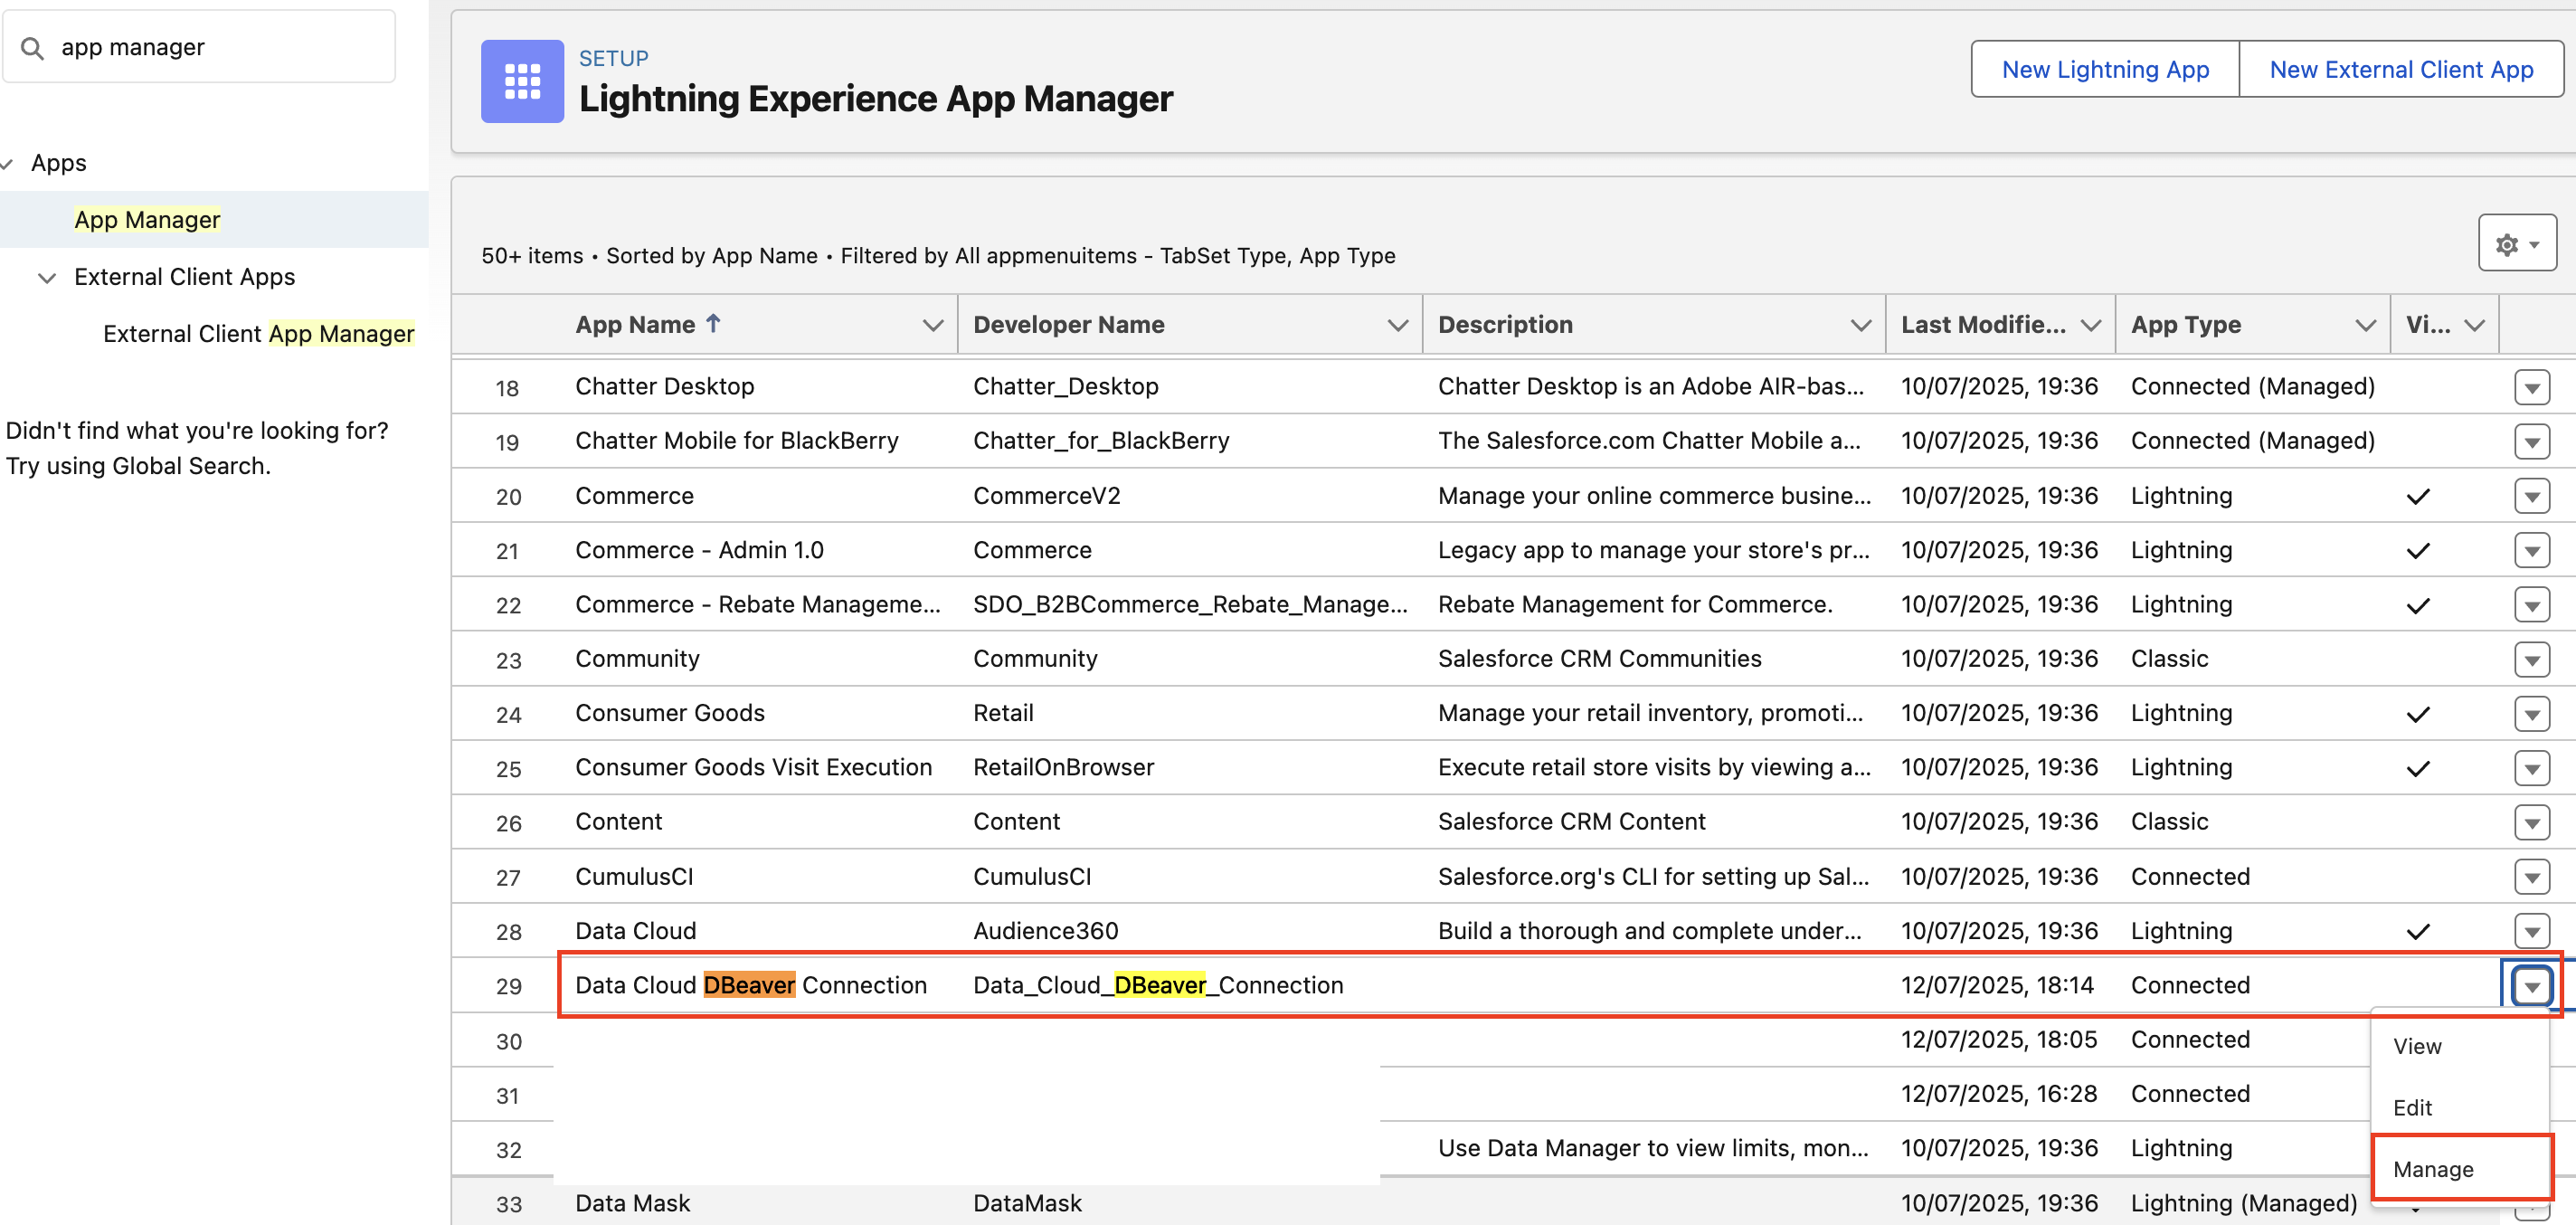
- Click
Edit Policies.
- Under
OAuth Policies, set IP Relaxation toRelax IP Restrictions.
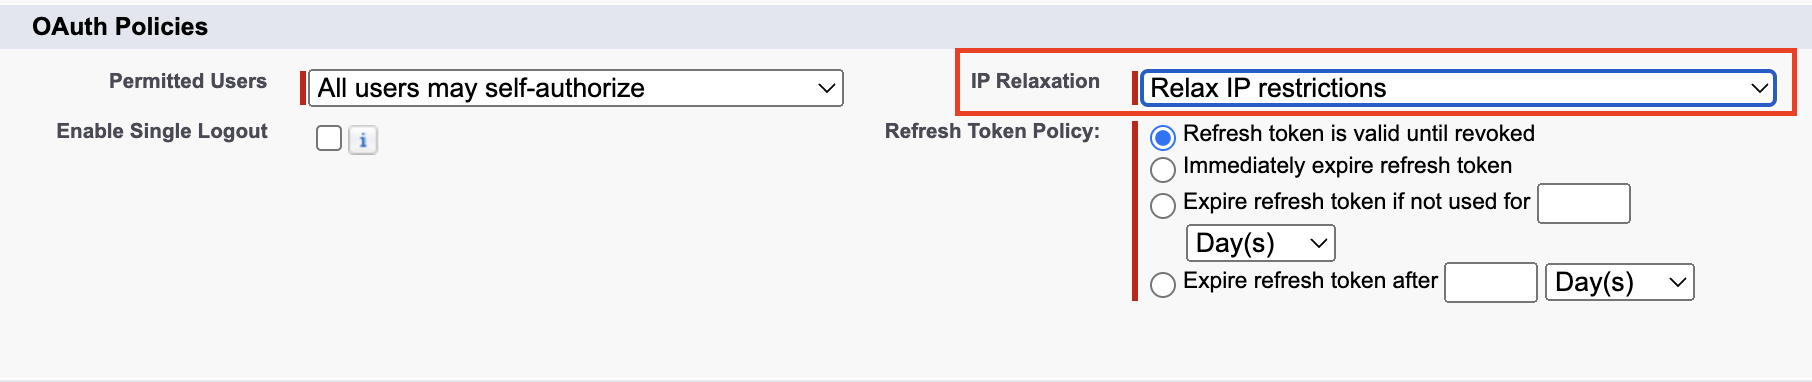
- Click
Saveat the bottom of the page.
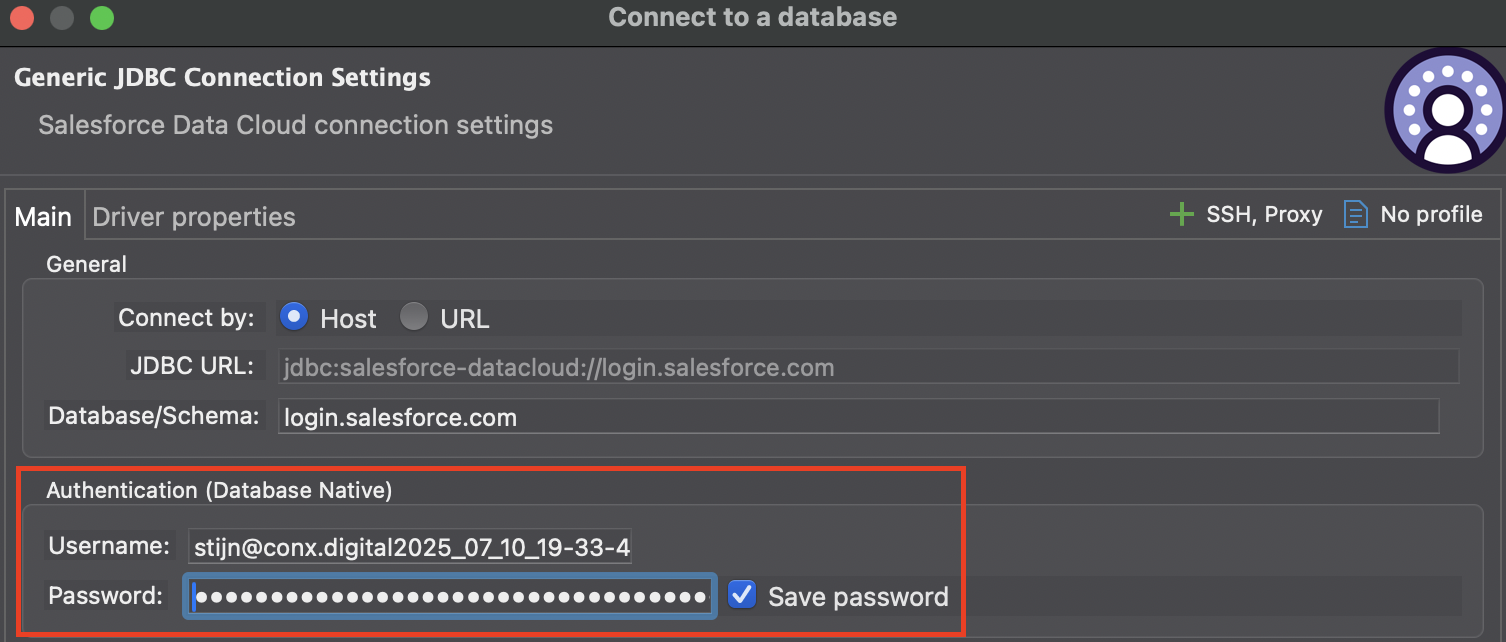
Step 4: Configure DBeaver Connection
- Open DBeaver.
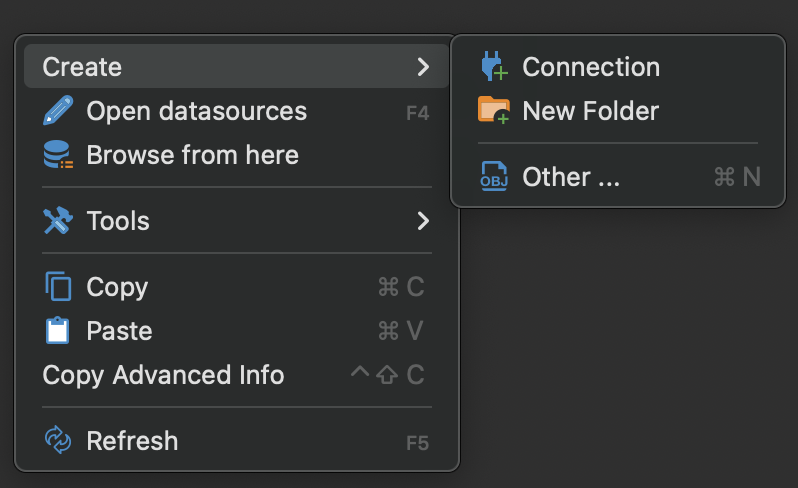
- Right-click in the left side-pane and click Create > Connection.
- Select
Salesforce Data Cloudas the Database Driver.
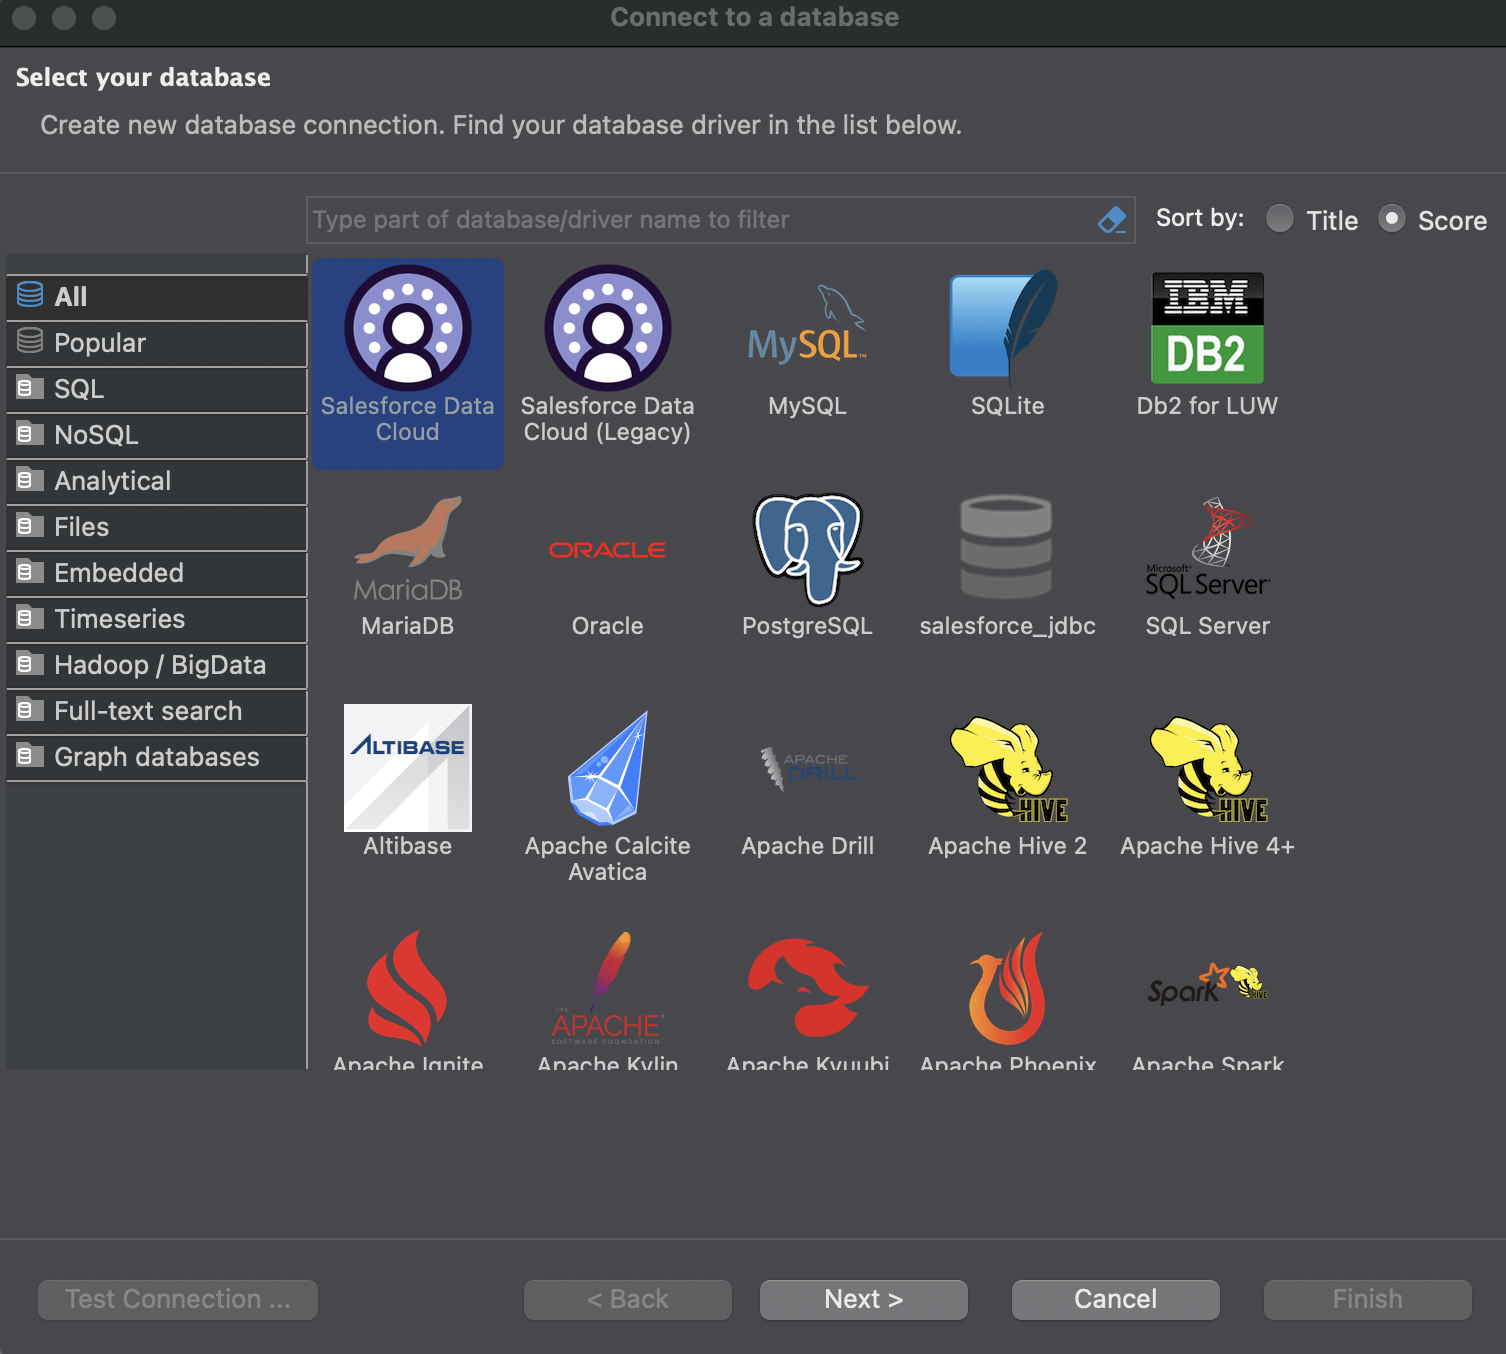
-
Click
Next. -
Enter your Salesforce Username and Password.
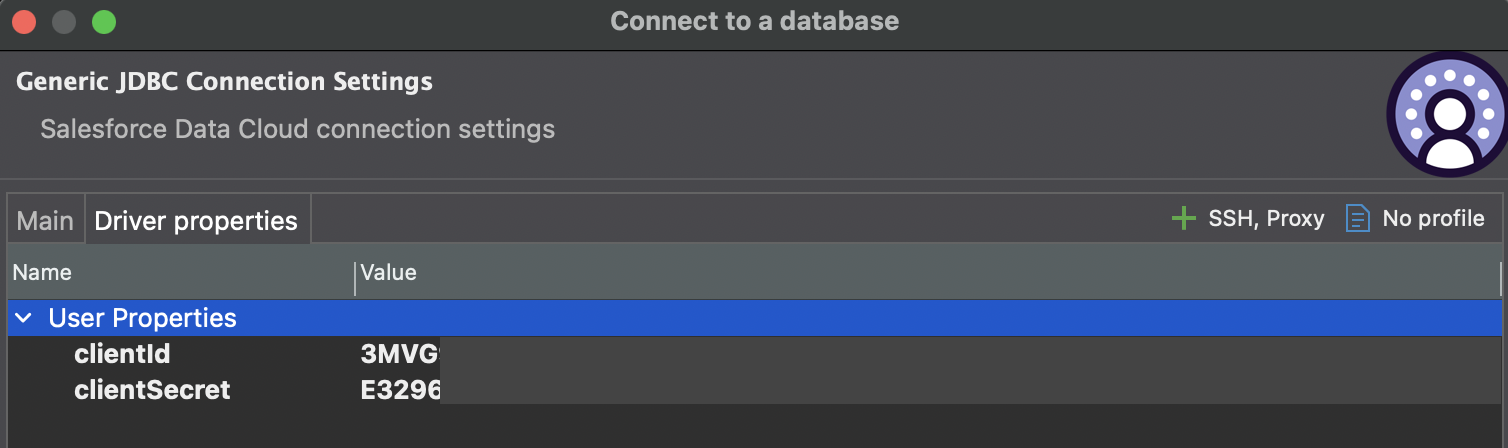
- Go to the
Driver Propertiestab and add the following Properties using the Consumer Key and Consumer Secret you got from the Connected App:
Note that the Property names are case-sensitive.
clientId:YOUR_CONSUMER_KEYclientSecret:YOUR_CONSUMER_SECRET
In case you have multiple Data Spaces in your Data Cloud instance, you can add an additional dataspace Property. If you don't add this property, the connection will default to the default Data Space.
- Click
Test Connectionto test if the connection is working. And if all is well, you should see a pop-up with statusConnected.
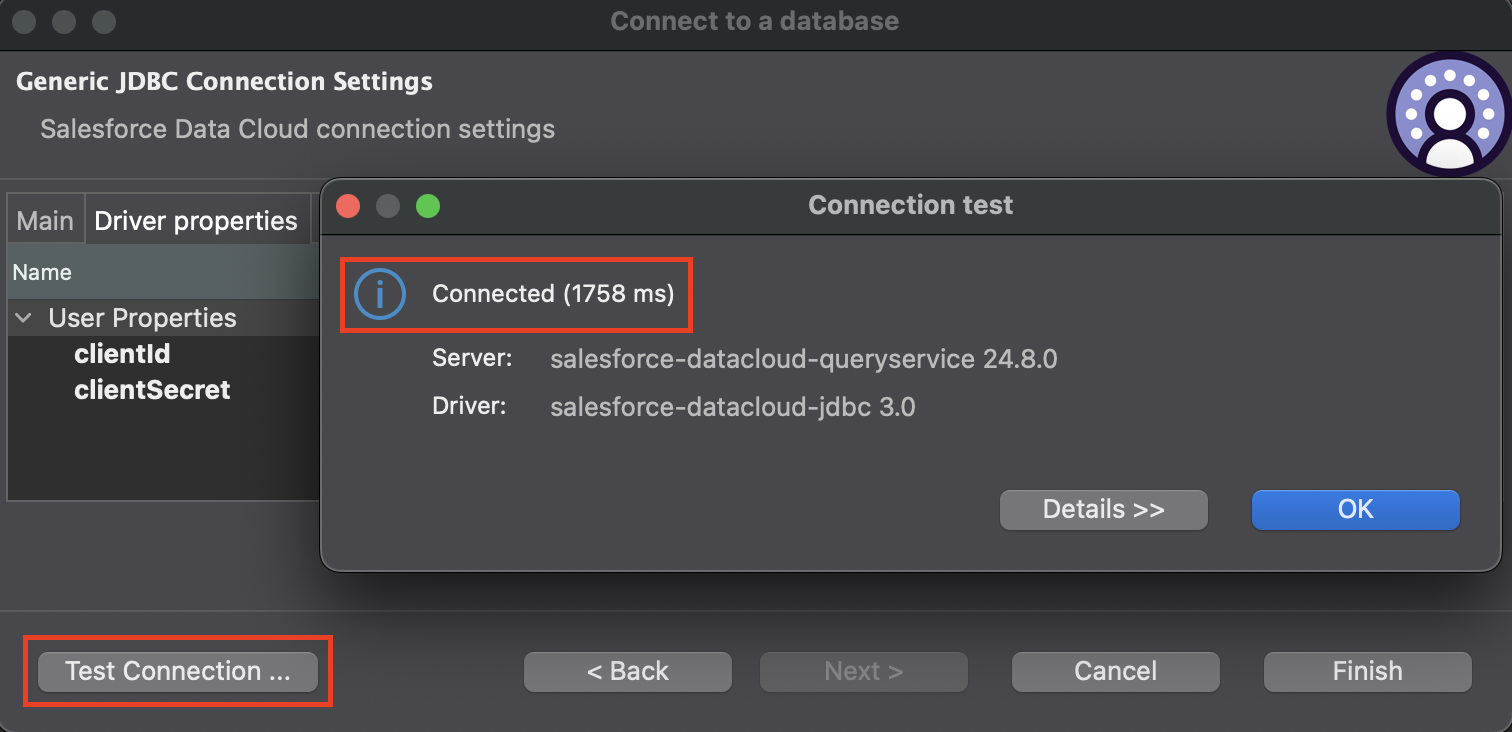
- Click
Finish.